DevOps team can accelerate the discovery and protection of critical cloud assets using Elastio. In this example, we show how we can use Terraform and Elastio Protection Plans to simplify data protection.
Using Terraform to tag assets
First, we use Terraform to tag our assets. We base our usage on v3.38.0 of Terraform which offers default asset tagging from the provider.
# Code snippet to set default tags.
provider "aws" {
  region = "us-west-2"
  allowed_account_ids = [
    "xxxxxxxxxxxx", #master
    "xxxxxxxxxxxx" #this
  ]
  default_tags {
    tags = {
      Environment = "Production"
      Use_Elastio = "False"
    }
  }
}
Since we do not need to backup all assets in our account, we initially set Use_Elastio to be “False”
Next, we tag specific resources that we want to backup and overwrite the tag:
# Code snippet to set tag on ebs volume
resource "aws_ebs_volume" "pri" {
  availability_zone = "${var.region}a"
  size = 12
  tags = tomap({ "Name" = "Primary Server", "Data Volume" = "True", "Use_Elastio" = "True" })
}
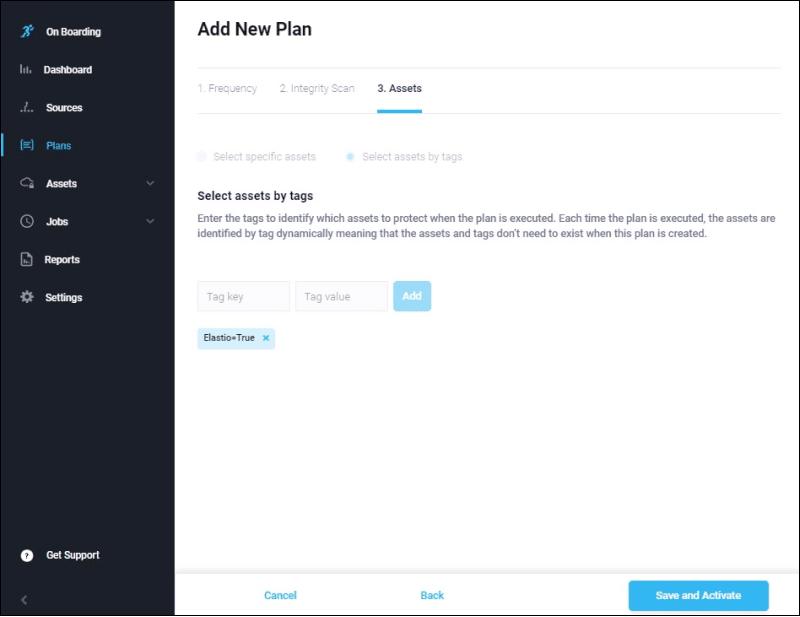
Once complete, we can open the Elastio Tenant and create our plan using the tag “Elastio=True” in the plan definition as shown below.
Once complete, we can open the Elastio Tenant and create our plan using the tag “Elastio=True” in the plan definition as shown below.

Once the plan is activated, any EBS or EC2 resource tagged with “Elastio=True” now or in the future will be automatically protected by Elastio. A common use case for DevOps engineers is to create a plan with your backup frequency, anti-malware options and asset tags. Then from your CI/CD pipeline, tag the assets as they are created from within TF. This automates data protection.